pro clima CONTEGA SL
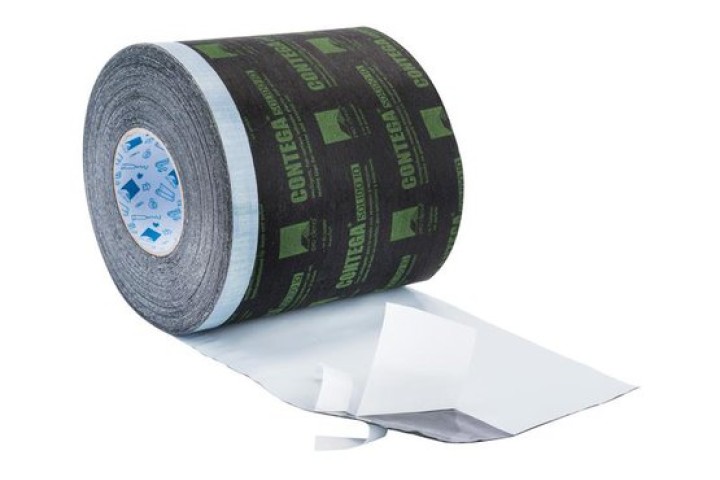
Raamaansluitband met 3 kleefstrips en dampremmende eigenschappen om kozijnen aan te sluiten op de luchtdichte laag
Product benefits
- Eenvoudig te verwerken: extra dun en daardoor eenvoudig te vouwen in hoeken
- Geschiktheid onafhankelijk bevestigd: getest conform MO-01/1 en goedgekeurd door het ift Rosenheim (DE)
- Vlieszijde bepleisterbaar: gedefinieerde overgang tussen kozijn of damprem en pleisterwerk
- Flexibel toepasbaar: drie kleefstroken voor toepassing bij hout-, metsel en betonwerk
- Betrouwbare aansluitvoegen in combinatie met CONTEGA EXO buiten
- Bouwen volgens de norm: voor luchtdichte aansluitingen conform DIN 4108-7, RE 2020 en SIA 180
- Uitstekende resultaten bij de test op schadelijke stoffen, getest conform ISO 16000
Applications
Geschikt voor binnen om kozijnen en deuren luchtdicht en dampremmend aan te sluiten op aangrenzende bouwconstructies, met drie kleefranden.
Product details
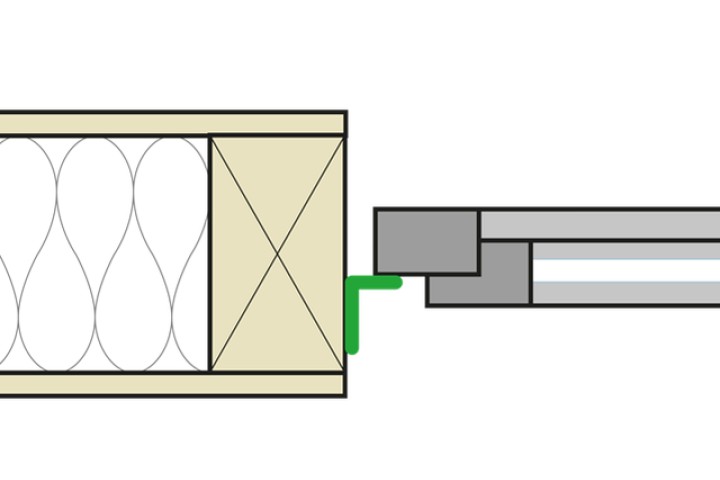
Installation steps
Installation steps: 1. Timber frame structures

Schematic diagram
If the window is already installed, CONTEGA SL is stuck to the frame.

1a. Remove the inner release film
Remove one of the release film strips on the membrane side (smooth side).

1b. Stick to the frame
Place the full width of the adhesive strip of the tape onto the frame and stick the first reveal side.

1c. Preparation of corners
Fold the tape in the corner area. Ensure that there is uninterrupted airtight adhesion at the window. Then continue sticking around the rest of the frame. When finished, cut the tape, allowing approx. 5 cm of an overlap.

1d. Stick to the reveal
Remove the second strip of release film from the smooth membrane side and stick the tape all around the reveal.

1e. Rub the tape firmly to secure the adhesive bond
Rub the tape firmly onto the reveal and frame. This step can be carried out more efficiently and in a manner that is kinder to your hands by using the pro clima PRESSFIX application tool.

1f. Tape the ends
In the area where the tape ends are to be stuck, remove the release films on the fleece side to approx. 4 cm to the left and right of the joint.

1g. Tape the ends
Stick the overlap joint of CONTEGA SL with a short piece of TESCON VANA all-round adhesive tape. Rub firmly using the pro clima PRESSFIX application tool to secure the adhesive bond. You’re finished!
Installation steps: 2. Timber frame structures

Schematic diagram
CONTEGA SL has already been stuck to the side of the window frame – for example, by the window installation technician.

2a. Fold the corner
Fold the tape in the corner area. Remove the release film in the corner area and stick the tapes to one another. Ensure that there is uninterrupted airtightness at the joint between the tapes.

2b. Stick to the reveal
Remove the release film from the smooth membrane side and stick the tape all around the reveal in an airtight manner. Rub firmly using the pro clima PRESSFIX application tool to secure the adhesive bond. Ensure that there is sufficient resistance pressure.

2c. Stick the ends
Apply an approx. 5 mm thick line of ORCON F adhesive sealant between the overlapping ends of the tape. Place the tape onto the adhesive. Do not press the adhesive completely flat so as to allow for relative motion between components.
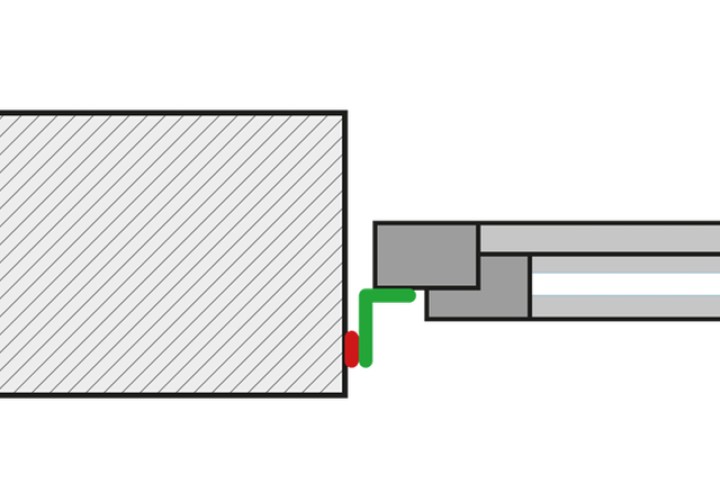
Installation steps: 3. Masonry/concrete structures

Schematic diagram
If the window is already installed, CONTEGA SL is stuck to the frame.

3a. Stick to frame
Remove one of the release film strips on the smooth membrane side. Place the full width of the adhesive strip of the tape onto the frame and stick the first reveal side. Rub firmly using the pro clima PRESSFIX application tool to secure the adhesive bond.

3b. Remove the inner release film
Remove the inner strip of release film on the first reveal side as far as the first corner.

3c. Preparation of corners
Fold the tape in the corner area. Ensure that there is uninterrupted airtight adhesion at the window. Then continue sticking around the rest of the frame. When finished, cut the tape, allowing approx. 5 cm of an overlap.

3d. Apply adhesive to surface
Apply an approx. 5 mm thick line (more in the case of very rough subsurfaces, if necessary) of ORCON F adhesive sealant to the soffit in a zig-zag pattern.

3e. Place the tape onto the adhesive
Remove the inner release film all the way around. Note: ORCON F will not stick to the release paper. Place the tape onto the adhesive. Do not press the adhesive completely flat so as to allow for relative motion between components.

3f. Stick the ends
Remove the outer release film from the lower tape. Apply a line (approx. 5 mm thick) of ORCON F adhesive sealant between the overlapping ends of the tape. Place the tape onto the adhesive. Do not press the adhesive completely flat so as to allow for relative motion between components.

3g. Remove the outer release film
Remove the outer strip of release film (on the fleece side) all the way around. Note: plaster will not adhere to the release film. You’re now ready for plastering!
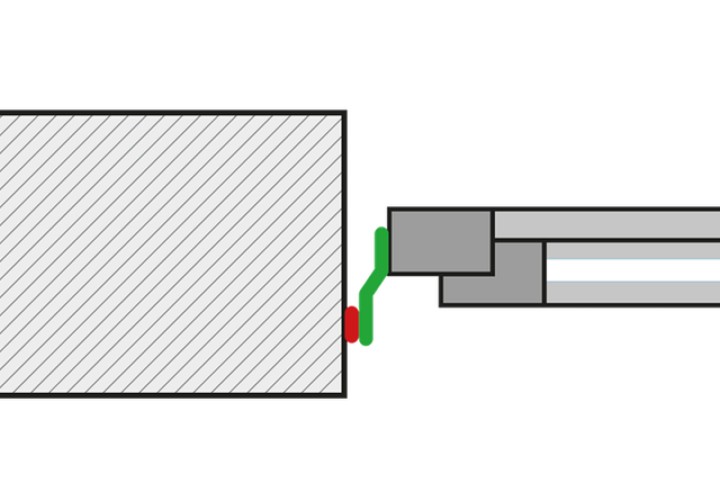
Installation steps: 4. Masonry/concrete structures

Schematic diagram
CONTEGA SL has already been stuck to the side of the window frame – for example, by the window installation technician.

4a. Remove the inner release film
Apply an approx. 5 mm thick line (more in the case of very rough subsurfaces, if necessary) of ORCON F adhesive sealant to the reveal in a zig-zag pattern.

4b. Remove the inner release film
Remove the release film from the non-printed side of the membrane and place the tape onto the adhesive. Note: ORCON F will not stick to the release paper. Do not press the adhesive completely flat so as to allow for relative motion between components.

4c. Preparation of corners
Fold the tape in the corner area. Remove the release film in the corner area and stick the tapes to one another. Ensure that there is uninterrupted airtightness at the joint between the tapes.

4d. Place the tape onto the adhesive
Place the tape onto the adhesive. Do not press the adhesive completely flat so as to allow for relative motion between components.

4e. Stick the ends
Apply an approx. 5 mm thick line of ORCON F adhesive sealant between the overlapping ends of the tape. Place the tape onto the adhesive. Do not press the adhesive completely flat so as to allow for relative motion between components.

4f. Stick the corners
Stick the tape strips to one another in the corner area. Apply ORCON F to the reveal in a tight zig-zag pattern. Place the tape onto the adhesive. You’re now ready for plastering!

4g. You’re finished!
The airtight joint is now complete, and the tape can be plastered over.

pro clima CONTEGA SOLIDO IQ-D
Intelligente tape voor luchtdichting en slagregendichting rond ramen en deuren
