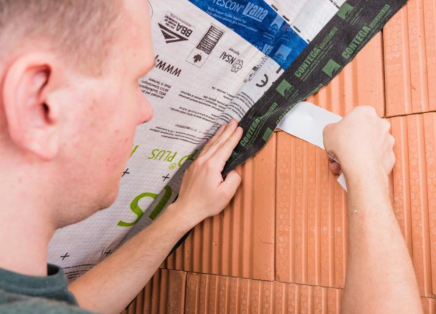
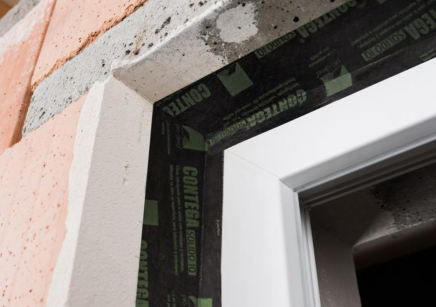
pro clima CONTEGA SOLIDO IQ
Intelligent tape for airtight and driving rainproof sealing around windows and doors, and for connections with plasterwork
Product benefits
The text on this page was automatically translated. Minor translation errors are possible. In case of doubt, the original versions (Dutch and French) are correct.
- Healthy constructions - Suitable for interior (more vapor-tight) and exterior (vapor-open)
- Highest durability and reliability due to moisture-resistant SOLID adhesive, also on mineral surfaces
- Plasterable
- Connection immediately perfectly airtight / driving rainproof, independently tested and approved
- Fully adhesive
- 8 months UV and weather resistant
Installer benefits
- Simple application in corners
- Prevents mistakes - always the right tape for both interior and exterior.
- Winter application - from -10°C
Applications
Best choice for:
- Self-adhesive airtight and driving rainproof sealing around windows and doors (attachment on the FRONT side of the window profile)
- Airtight and/or driving rainproof connections with mineral or to-be-plastered surfaces
- On metal beams to prevent rust penetration and as a carrier for plasterwork
Product details
Installation steps
Other application situations

A - Sealing transition between membranes and masonry wall
Guide the vapour control membrane into position. Allow for slack to accommodate relative motion between components.
Remove the release films from CONTEGA SOLIDO IQ(-X).
Centre the tape on the transition point and gradually stick it in place.
Rub using the PRESSFIX application tool to secure the adhesive bond.

B - Sealing rectangular penetrations on masonry/concrete
Stick the narrow (in the case of IQ-X: exposed) adhesive strip to the first side of the beam, allowing for excess tape on either side. Remove the remaining release film and stick the tape to the subsurface.
Cut nicks into the tape at the beam edges and stick the narrow adhesive strip to the beam and subsurface.
Tape the other sides in an analogous manner to create an airtight seal, applying corner patches if necessary.
Rub using the PRESSFIX application tool to secure the adhesive bond.
Sub-sill on timber projects

1. Prepare the window opening
Preparatory step for window installation on timber construction projects
Tape and seal the structure surface, window reveals and all joints so that they are airtight and watertight against driving rain.
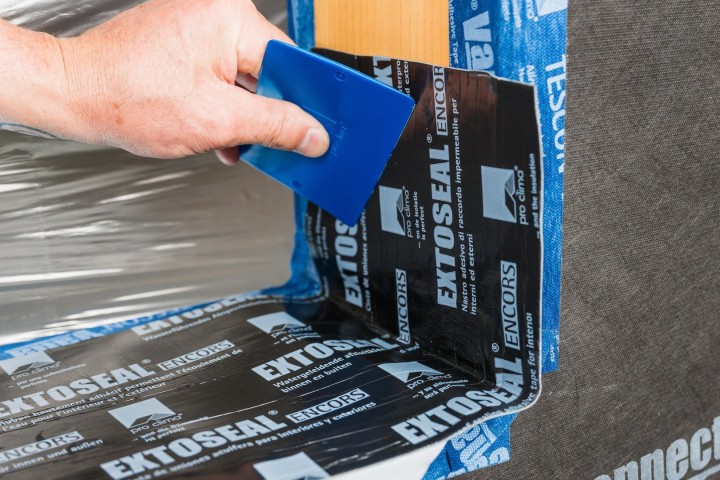
2. Side details
In the case of reveal plates or a rear-ventilated structure, allow EXTOSEAL ENCORS to run approx. 10 to 15 cm up each reveal side.
If the reveal surfaces are to be plastered, run the sill tape up approx. 6 cm or else to the upper edge of the window sill profile.
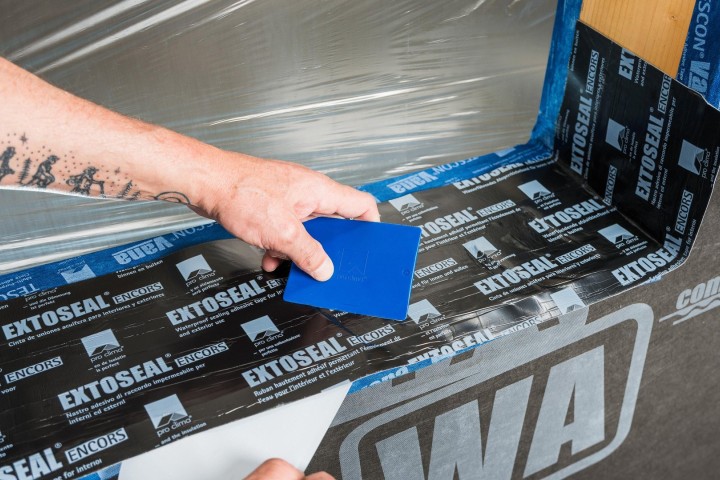
3. Apply tape to the sill surface
Apply EXTOSEAL ENCORS to the sill surface, extending it at least as far as the inner edge of the window profile or – if necessary – across the entire depth of the structure. Allow an excess of at least 2 cm on the outside, or else as far as a suitable drip profile.
A sloped wall surface under the window will drain off water.
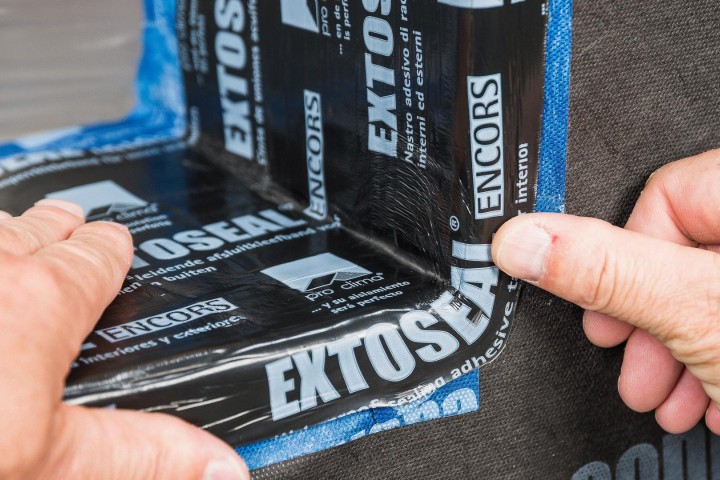
4. Extend the sub-sill to the outside
In the case of a rear-ventilated facade, stretch the tape in the corners (without damaging it) and stick it to a suitable subsurface, e.g. SOLITEX FRONTA WA.
Rub EXTOSEAL ENCORS using the PRESSFIX tool to secure the adhesive bond.
Sub-sill on masonry and concrete projects

1. Apply a smooth plaster finish to the window opening
Preparatory step for window installation on masonry and concrete construction projects
Apply a smooth plaster finish to the side and bottom areas where seals are to be installed.
If a plaster finish or sealing filler is applied to the wall area under the window, the transition to the side reveals can be sealed with EXTOSEAL ENCORS to cover any possible cracks (capillary gaps).
A sloped wall surface under the window will drain off water.
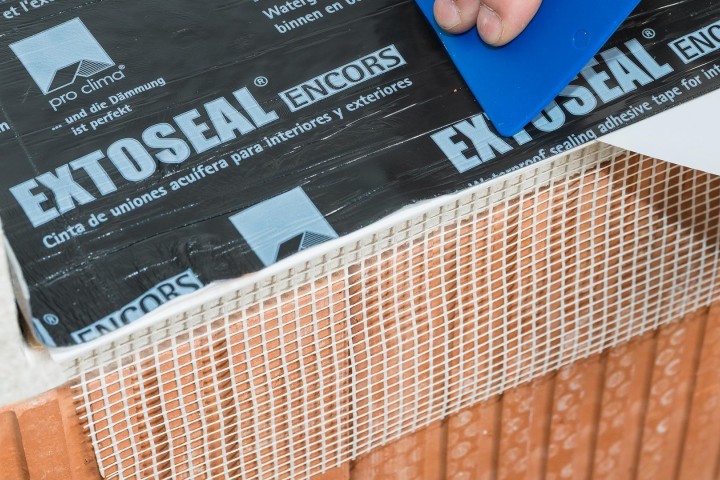
2. Side details
If the reveal surfaces are to be plastered, allow EXTOSEAL ENCORS to run approx. 6 cm up each reveal side or else to the upper edge of the window sill profile.
In the case of reveal plates or a rear-ventilated structure, allow approx. 10 to 15 cm here.

3. Apply tape to the sill surface
Apply EXTOSEAL ENCORS to the sill surface, extending it at least as far as the inner edge of the window profile or – if necessary – across the entire depth of the structure.
Stick the excess tape on the outside to a suitable drip profile.
Installation steps: Pre-installation before window mounting

1. Window to be mounted into a timber, masonry or timber structure
CONTEGA SOLIDO IQ is to be pre-installed before the window is mounted.
The frame is laid out flat. The open ends of the window profile have been filled and the filling/sealing profiles have been attached.
The exterior side of the frame is facing up.

2. Start applying tape at the top of the frame
Remove the narrow release film strip, position the tape on the side of the frame flush with the frame edge and then stick in place. The fleece side of the tape should extend downwards here.
Rub using the PRESSFIX application tool to secure the adhesive bond.
If tape application is started at the side of the window frame, ensure that the tape overlap is executed in a water-resistant manner.

3. Create corner folds
Create corner folds as shown here to make it easier to create a reliable seal to the window reveal at the corners later on.
The size of the corner folds should correspond to around 1.5 times the joint width.

4. Apply tape all around frame and rub to secure
Stick the tape all around the side of the frame. At the end, cut off any excess length and stick the overlap.
Repeat steps 2 to 4 for the opposite (exterior) side of the window, as required.
Ensure that there is uninterrupted airtightness/windtightness when applying the tape.
Rub using the PRESSFIX application tool to secure the adhesive bond.

5. Install the window and insulate the joint
Fold in the CONTEGA SOLIDO IQ tape so that it is not in the way, and then mount the window using a suitable fastening system.
Fill in the joint with a suitable insulation material, leaving no cavities.

6. Stick the tape all around the frame and rub to secure
Remove the remaining release films and gradually stick the tape to the reveal all around the window frame, allowing slack to accommodate relative motion between components.
Rub using the PRESSFIX application tool to secure the adhesive bond.

7. Sealing the window joint on the opposite side
CONTEGA SOLIDO IQ should be applied in an analogous manner to seal the window joint on the opposite (exterior or interior) side. Repeat the taping steps to achieve a seal that is airtight or windtight/watertight against driving rain.
Installation steps: Window already mounted

1. The window is already mounted
The window joint on an already mounted window is to be sealed with CONTEGA SOLIDO IQ in combination with EXTOSEAL ENCORS on the exterior, or to a suitable substrate, e.g. a smooth plaster finish, on the interior.
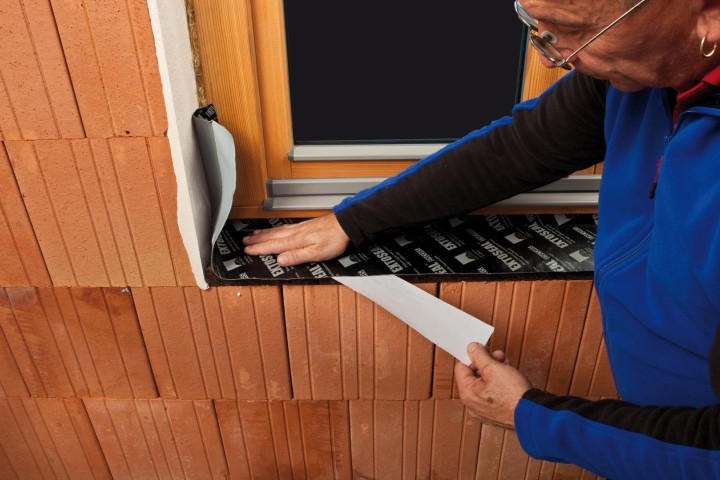
2. Create a sub-sill
Use the EXTOSEAL ENCORS sub-sill tape to create a sub-sill as a second waterproof layer. Guide the tape into the corners precisely and also run it to a height of approx. 6-15 cm on the reveals on each side depending on the type of facade used.
Close off any open profile ends and groove ends using a suitable sealant.

3. Cut the CONTEGA SOLIDO IQ tape to length
Add approx. 8 cm to the length of each side of the frame and cut this length of tape.

4. Remove the first release film strip
Remove approx. 5-10 cm of the narrow release film strip.

5. Start applying tape at the top of the frame
Allowing CONTEGA SOLIDO IQ to extend about 4 cm onto the lintel surface from the corner, start applying the narrow adhesive strip of the tape onto the lintel and the reveal.
Guide the tape along the vertical window frame as far as the sub-sill for exterior application or as far as a suitable sill surface for interior application.
Remove the remaining release film strips and stick the tapes to the reveal, allowing slack to accommodate relative motion between components.
Apply tape in an analogous manner to the lintel area and the area under the window.
Close off any open groove ends using a suitable sealant.

6. Carry out installation work carefully
Careful taping all around the window with no gaps is a prerequisite for airtightness, windtightness and resistance to driving rain.
Rub using the PRESSFIX application tool to secure the adhesive bond.
General conditions
The bonds should not be subjected to tensile strain.
Rub the adhesive tapes firmly to secure the adhesive bonds. Ensure that there is sufficient resistance pressure.
Windproof, airtight or rainproof sealing can only be achieved if this sealing tape is installed without folds, creases or joints. Ventilate continuously and systematically to prevent build-up of excessive humidity; use a dryer if necessary.
When plastering, please observe the recommendations of the plaster manufacturer for non-absorbent subsurfaces. A bonding course may be necessary.
| Reference Number | Attributes |
|---|---|
| 16811 | Dimensions: 8cm x 30m |
| 16815 | Dimensions: 10cm x 30m |
| 16817 | Dimensions: 15cm x 30m |
| 16819 | Dimensions: 20cm x 30m |
| 1AR02593 | Dimensions: 25cm x 30m |
| 1AR02595 | Dimensions: 30cm x 30m |

pro clima TESCON VANA
All-round tape with fleece carrier, for indoor and outdoor use

